What
- Learn audio recording techniques and documentation of the recording process
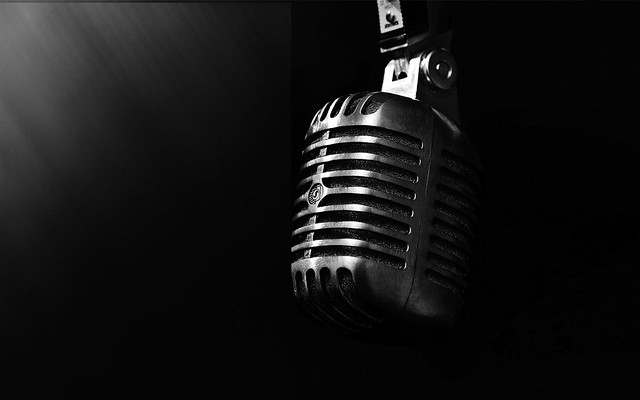
- Record audio from a variety of sources with a Zoom H4n digital recording deck and a professional microphone
- Identify the basic elements of a quality audio signal by selecting and checking the proper equipment
- Set a goal and work independently to monitor, define, prioritize, and complete tasks for this project without direct oversight
Why
- The sound quality of real-world sources we hear in recordings depends on the proper use of quality equipment and the placement of the microphone
How
- Set a 2st Century Goal for working independently
- Review the Google Form Survey to assess your ability to work independently to monitor, define, prioritize, and complete tasks for this project without direct oversight
- Recording
- Copy and paste the Audio Recording Sound Safari TEMPLATE into a new blog post
- Use the Sound Safari Roles Form
- Use the Instrument Recordings Settings Form
- Review the requirements of the project
- Watch the two tutorials below to learn how to use the Zoom H4n Audio Deck
- The Three Keys to Great Audio for Video (Basic)
- Filmmaking 101 – How to Record High-Quality Audio on a Budget (Detailed)
- Le Duc wrote shortcuts to sections of this video tutorial toward the bottom of this document
- Advanced Tutorials (Optional)
- Record 15 – 30 seconds samples of different sounds with a professional microphone
- Voice (within a few inches of the microphone)
- Record a descriptive INTRO at the beginning of the recording to explain what we are hearing
- Outdoors / Environment (use the same voice but have the person at least 10 feet away from the microphone)
- Record a descriptive INTRO at the beginning of the recording to explain what we are hearing
- Instrument (Acoustic Guitar, Amplifier, etc.) (within a few inches of the microphone)
- Record a descriptive INTRO at the beginning of the recording to explain what we are hearing
- Voice (within a few inches of the microphone)
- Take pictures of your microphone placements

- Use the Instrument Recording Setting Document (PDF) to write where you placed the microphone and other relevant information that will help you remember EXACTLY where the microphone was placed and how you recorded the sound source
- Edit with Soundtrap / GarageBand / Audacity
- Watch the Soundtrap Podcast Tutorial
- Edit the .wav file from the H4n Audio Deck
- Export and upload the .mp3s to Google Drive and make sure they are public
- Create and Publish the Blog Post
- Follow directions in the Audio Recording Sound Safari TEMPLATE
- Follow the directions in the Audio Recording Sound Safari Feedback Form (PDF)
Examples
Tools
- Apple GarageBand
- Soundtrap.com (Le Duc has classroom code for more tools)
- Audacity (free)
Resources
- Mr. Le Duc’s Audio Diigo.com bookmarks
- Mr. Le Duc’s Recording Diigo.com bookmarks
- VIDEO TUTORIAL: Export Sound From GarageBand to Soundcloud to Edublogs
- Soundtrap.com Help Video Tutorials
- 4 Track Session Recording Workflow with Mackie Mixer, Zoom H4n, and Audacity Tutorials
- Sound Design Operation and Control
- Microphones and Recording Basics
- prosoundweb.com/topics/production/stereo_microphone_techniques/
- prosoundweb.com/topics/studio/mic_technique_basics_for_musical_instruments/2/
- prosoundweb.com/channels/recording/in-the-studio-3-ways-to-position-your-room-mics/
- mxlmics.com/support/recording-basics.php
- jazzguitar.be/forum/recording-music-software/32025-recording-microphone-jazz-guitar-amp.html
- creativeedgemusic.com/2012/12/marshall-1960a-4×12-guitar-cab-mic.html
- michalkaszczyszyn.com/
- classicalguitarnstuff.com/2015/04/27/recording-classical-guitar-part-2-microphone-positioning/
- quora.com/What-is-the-Recorder-Man-Miking-Technique-Hows-it-done-and-whats-the-target
Zoom Audio Deck Tutorial
- 4:25: Rode NTG2 Shotgun Mic Overview
- 7:18: XLR Audio Cable
- 7:35: Zoom H4n Buttons, Inputs, and Outputs Overview
- 9:00: Front Screen Overview
- 9:45: Bottom XLR, 1/4 inch, and Power Inputs
- 10:05: Menu Details
- 10:15: Folder Settings
- 10:21: File Settings
- 10:32: Input Settings
- 11:30: Record Settings
- 12:05: System
- 12:09: Battery
- Alkaline and Lithium batteries use the same setting
- Ni-MH are rechargeable batteries
- Only set this setting if you are using rechargeable batteries!
- Watch more about this from –
- 12:09: Battery
- 12:43: SD Card – Formatting
- 12:50: USB – Connecting to Computer
- 12:51: Mode – Stereo, 4 Channel, MTR
- 13:03: Plug in Microphone
- 13:42: How to Operate Zoom with Microphone Plugged in
- 17:49: Downloading Audio to a Computer
- 18:29: Setting up a Boom Pole
- 19:49: Cable Management
- 21:03: Batman Demo Recording
- 21:18: Get Your Frame
- Get the mic just out of the frame, but as close to the mouth as possible
- Hold the mic above the talent, if possible
- 21:18: Get Your Frame
- 22:33 Set your recording levels by having the talent practice the loudest lines

You must be logged in to post a comment.